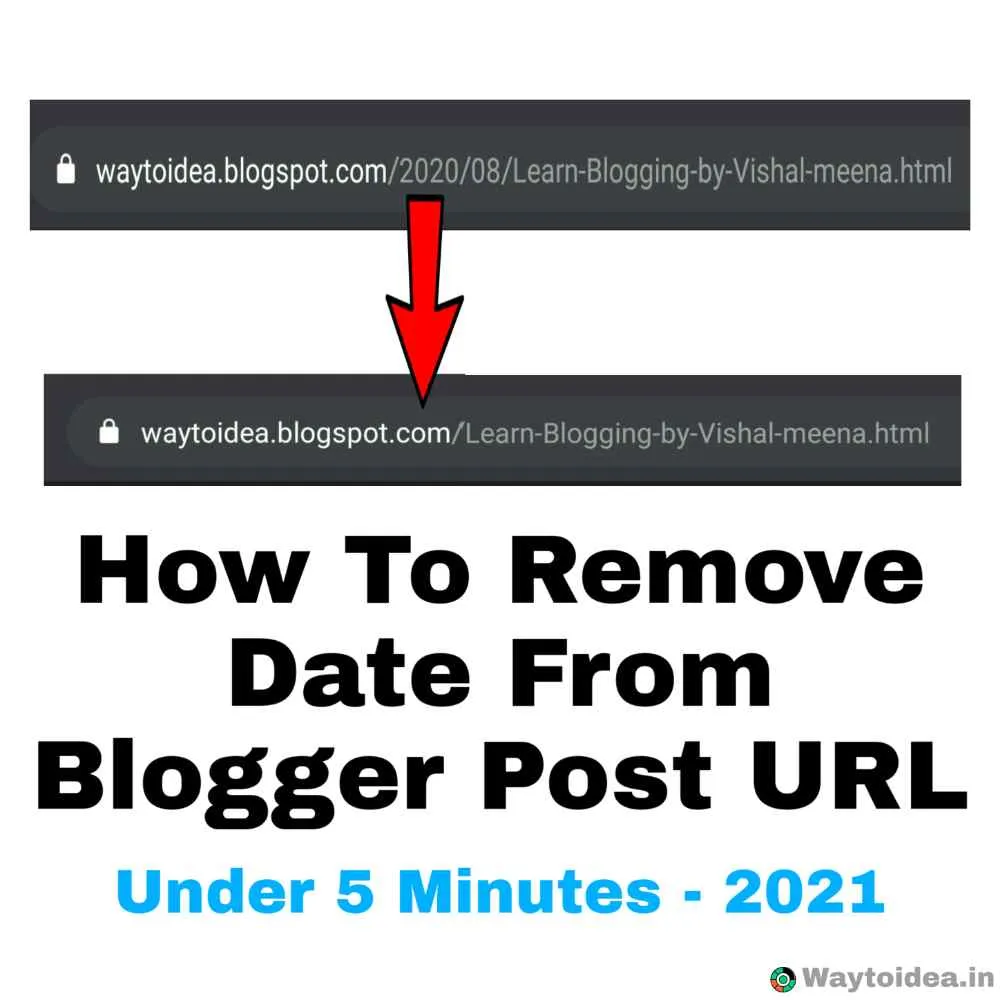
If your blog or website is on blogger, you face showing date and month in blogger post URL. Want to know how to remove date from blogger post URL? Want to make blogger post URL like WordPress. So be with me till the end of the post. In blogger , there is no option to remove date from blogger post URL, like WordPress. You have to remove the date from blogger post URL manually. When we publish a post on blogger, that will contain the published date of that post. The following is the screen capture of the default blogger post URL. Yet, when you compose a post on WordPress, it’s URL is extraordinary, here the date and .html won’t come in the post URL. There are options to show or hide date and month in post URL. WordPress post URL looks more professional than the blogger Post URL. That is the reason we suggest all of you, remove date from blogger post URL. So today, we will learn how to remove date from blogger post URL in 4 simple Steps. And make it more professional like WordPress post URL.
Pros and Cons Of Removing Date From Blogger Post URL
When you remove the date from the blogger post URL , there are some pros and cons of eliminating the date and time. So let’s know these pros and cons. | | | | 1. Removing Date from Blogger blog post will not make your content user feel old. Your website content will look fresh. | 1. It is good to remove the date from the post URL, but only for new bloggers. If your blog has 15+ Posts, then don’t remove date from blogger post URL. It will make many redirects. | | 2. After removing the date and time from the blogger post URL, it will help to better rank in search engines. | 2. Suppose your blog post \n\nranked in Google\n\n or any search engine. Then you can lose from ranking in search engines. | Pros and Cons Of Removing Date From Blogger Post URL Follow 4 simple steps to remove date from blogger post URL.
- Login Into Your Blogger Dashboard and go to the theme section.
- After clicking on the Theme section, Get into the “Edit HTML.”
- Now, Find out the
<head>tag here. You can also find it out with the help of Ctrl+F. - Now, Copy the Below Given Code and Paste it after the
<head>tag and click on Save theme.
<script type="text/javascript">
//<![CDATA[
// BloggerJS v0.3.1
// Copyright (c) 2017-2018 Kenny Cruz
// Licensed under the MIT License
var urlTotal,nextPageToken,postsDatePrefix=!1,accessOnly=!1,useApiV3=!1,apiKey="",blogId="",postsOrPages=["pages","posts"],jsonIndex=1,secondRequest=!0,feedPriority=0,amp="&"[0];function urlVal(){var e=window.location.pathname,t=e.length;return".html"===e.substring(t-5)?0:t>1?1:2}function urlMod(){var e=window.location.pathname;"p"===e.substring(1,2)?(e=(e=e.substring(e.indexOf("/",1)+1)).substr(0,e.indexOf(".html")),history.replaceState(null,null,"../"+e))🙁e=(e=postsDatePrefix?e.substring(1):e.substring(e.indexOf("/",7)+1)).substr(0,e.indexOf(".html")),history.replaceState(null,null,"../../"+e))}function urlSearch(e,t){var n=e+".html";t.forEach(function(e){-1!==e.search(n)&&(window.location=e)})}function urlManager(){var e=urlVal();0===e?accessOnly||urlMod():1===e?getJSON(postsOrPages[feedPriority],1):2===e&&(accessOnly||history.replaceState(null,null,"/"))}function getJSON(e,t){var n=document.createElement("script");if(useApiV3){var o="https://www.googleapis.com/blogger/v3/blogs/"+blogId+"/"+e+"?key="+apiKey+"#maxResults=500#fields=nextPageToken%2Citems(url)#callback=bloggerJSON";nextPageToken&&(o+="#pageToken="+nextPageToken),nextPageToken=void 0}else o=window.location.protocol+"//"+window.location.hostname+"/feeds/"+e+"/default?start-index="+t+"#max-results=150#orderby=published#alt=json-in-script#callback=bloggerJSON";o=o.replace(/#/g,amp),n.type="text/javascript",n.src=o,document.getElementsByTagName("head")[0].appendChild(n)}function bloggerJSON(e){var t=[];if(useApiV3||void 0===urlTotal&&(urlTotal=parseInt(e.feed.openSearch$totalResults.$t)),useApiV3){try{e.items.forEach(function(e,n){t.push(e.url)})}catch(e){}nextPageToken=e.nextPageToken}else try{e.feed.entry.forEach(function(n,o){var r=e.feed.entry[o];r.link.forEach(function(e,n){"alternate"===r.link[n].rel&&t.push(r.link[n].href)})})}catch(e){}urlSearch(window.location.pathname,t),urlTotal>150?(jsonIndex+=150,urlTotal-=150,getJSON(postsOrPages[feedPriority],jsonIndex)):nextPageToken?getJSON(postsOrPages[feedPriority]):secondRequest&&(nextPageToken=void 0,urlTotal=void 0,jsonIndex=1,secondRequest=!1,0===feedPriority?(feedPriority=1,getJSON("posts",1)):1===feedPriority&&(feedPriority=0,getJSON("pages",1)))}function bloggerJS(e){e&&(feedPriority=e),urlManager()}bloggerJS();
//]]>
</script>
Now, you have done it. After this, If you go to any blogger post, you will see that date has been removed from the blogger post. If your are facing issues, then you can watch below given video tutorial to remove date from blogger post URL. Video Tutorial on How To Remove Date From Blogger Post URL in 2021
FAQs on How To Remove Date From Blogger Post URL
What is URL in Blogger?
Full form of URL is “Uniform Resource Locator.” The URL – a system of unified e-resources, or uniform resource location determiner. It is used as a standard for recording links to objects on the Internet (Hypertext links on the “World Wide Web”).
Conclusion
As you saw how easy it is to remove date from blogger post URL. You have to follow 4 simple steps to remove date from blogger post URL. If you get stuck in any step, then feel free to comment below. We hope this article helped you learn how to remove date from blogger post URL easily.
Loading comments...
